Folderit is a flexible multi-account architecture Document Management System (DMS) that allows a single set of login credentials to access and manage multiple independent sub-accounts. This is useful for multi-tenant environments needing strict data separation.
Key Features of FolderIT
-
Unified Login, Isolated Data: Switch between accounts (e.g. Finance, HR) from a single dashboard. Each account operates as a separate instance with its own API key, storage and audit logs.
-
Independent Permissions: Each sub-account maintains unique User Groups and permissions to ensure sensitive documents are visible only to authorized personnel.
-
Cross-Account Sharing: Users can selectively share specific folders or files between accounts to facilitate cross-departmental workflows.
Advanced List Folder Destination (Optional)
The standard integration relies on manually provided IDs for delivering files to your specified Folderit destination.
The Advanced List Folder Destination setup is an advanced option that allows OptimiDoc to connect directly to the FolderIT API, automatically fetching all available folders for scan delivery.
1. Prepare FolderIT API Credentials
-
Create a New API Client: Within the FolderIT Admin Console, navigate to the API Client section and create a new client.
-
Client Naming: Set the name to
OptimiDoc Advanced List. -
Set URIs: Set both the following URIs:
-
Redirect URI:
https://[YOUR_DATACENTER].optimidoc.cloud/AdvancedLists/OAuthCallback -
Post Logout Redirect URI:
https://[YOUR_DATACENTER].optimidoc.cloud/AdvancedLists/OAuthCallback
-
-
Capture Credentials: Save the new client. You must copy and safely store the resulting Client ID and Client Secret.
2. Configure OptimiDoc
-
Navigate: Within the OptimiDoc Tenant, navigate to:
Admin Console > Workflows management > Advanced Lists -
Create New List: Click to create a new Advanced List entry.
-
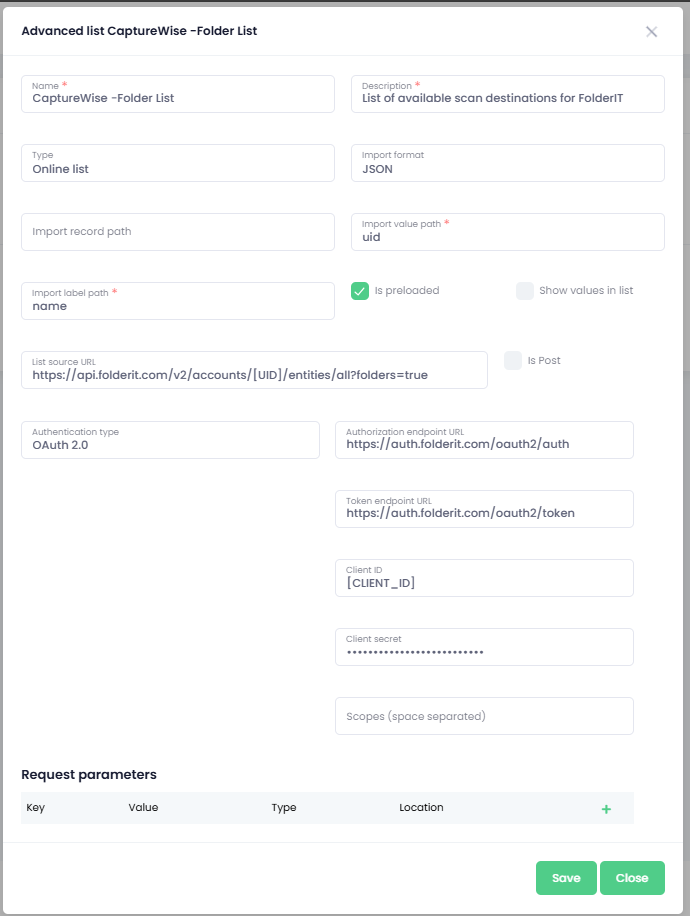
Basic Configuration: Fill out the following basic details:
-
Name: (Any descriptive name you choose)
-
Type: Online List
-
Import Format: JSON
-
Import Label Path:
name -
Import Value Path:
uid -
IsPreloaded: True
-
|
Setting |
Value |
Note |
|---|---|---|
|
List Source URL |
|
Replace |
|
Authentication Type |
|
|
|
Authorization Endpoint URL |
|
|
|
Token Endpoint URL |
|
|
|
Client ID |
|
The value saved previously |
|
Client Secret |
|
The value saved previously |
Creating the Scan Workflow
1. Creating Folderit API Credentials
A Paid FolderIT subscription is required to access and create API credentials.
Before setting up OptimiDoc, you must create a set of API credentials within your FolderIT account.
-
Login to your FolderIT account
-
Navigate to the API Credentials Page
-
Click Add Client
Path: Login > Manage Accounts > API
Configure the client using the following values:
|
Type |
Value |
|---|---|
|
Grant Type |
Authorization Code |
|
Authentication Method |
Basic |
|
Redirect URI |
|
|
Post Logout Redirect URI |
|
|
Client Name |
OptimiDoc Cloud API |
After saving, copy the Client ID and Client Secret and store them securely.
2. Creating the Workflow
Once the API credentials are created, set up the scan workflow within the OptimiDoc portal.
-
Navigate to your OptimiDoc tenant
-
Go to Admin Console > Workflows management
-
Select Document Workflows
-
Click Add Workflow
Path: Admin Console > Workflows management > Document Wortkflows
Configure Workflow: Parameters
Navigate to the Parameters tab in your new scan workflow and create two parameters as shown below.
|
Parameter Name |
Key |
Type |
Value |
|---|---|---|---|
|
File Name |
fileName |
Text |
EXAMPLE: |
|
Destination Folder |
folderID |
Advanced List |
Select the Advanced List you created earlier |
If you are not using an Advanced List configuration, change the type of parameter to TEXT.
Configure Workflow: Output Setting
-
In the Filename box, enter the parameter you just created: [fileName]
3. Setup the OptimiDoc API Destination
Configure the destination as follows
-
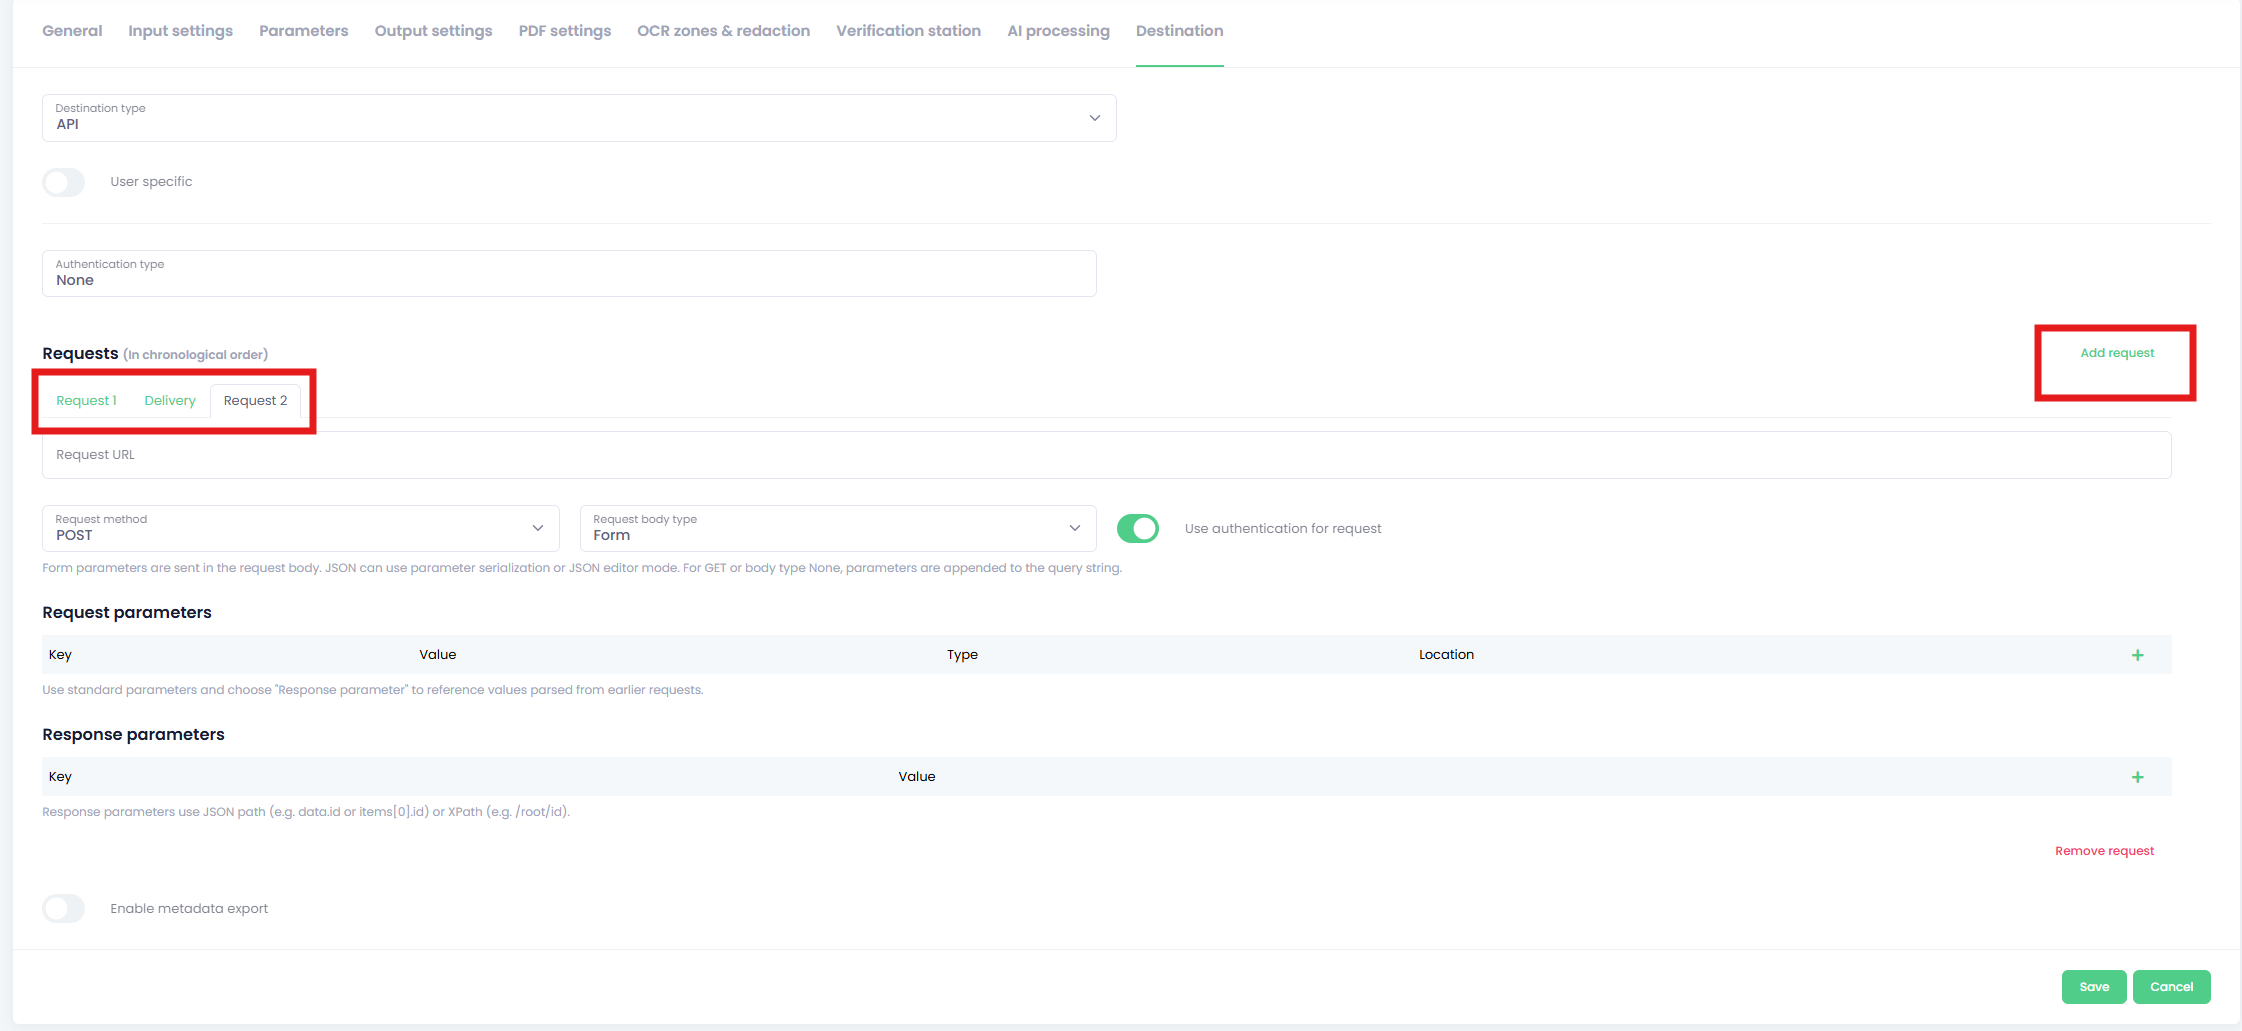
Destination Type:
API -
Authentication Type:
OAuth 2.0 -
Authorization Endpoint URL:
https://auth.folderit.com/oauth2/auth -
Token Endpoint URL:
https://auth.folderit.com/oauth2/token -
Client ID: The Client ID you created previously
-
Client Secret: The Client Secret you created previously
Using the Add Request button (as shown below) add two more requests and proceed to drag and re-arrange the requests in the following order.
-
Request 1 → Delivery → Request 2
Configure Request 1 (Initiate Upload)
-
Request Method:
POST -
Request URL:
https://api.folderit.com/v2/accounts/[UID]/files/upload-
Note: Replace
[UID](Including Brackets) with your Folderit account ID
-
-
Request Body Type:
JSON -
JSON Body Source:
JSON editor -
JSON Body Template
JSON{ "action": "create", "fileSize": [file_size], "fileName": "[fileName]", "contentType": "application/pdf", "folderUid": "[folderID]", "parts": { "1": [file_size] } }Response Parameters
|
Parameter Key |
JSON Path Value |
|---|---|
|
UploadID |
|
|
key |
|
|
upload_url |
|
You only need to create the response parameters once. They are then accessible throughout the entire delivery process.
Configure Delivery
-
Request Method:
PUT -
Destination URL:
[upload_url] -
Delivery body type:
Raw body -
Name of file form field:
file -
Use authentication for request
Toggle: Off(If left toggled On the request will error)
Configure Request 2
-
Request Method:
POST -
Request URL:
https://api.folderit.com/v2/accounts/[UID]/files/upload-
Note: Replace
[UID](Including Brackets) with your Folderit account ID
-
-
Request Body Type:
JSON -
JSON Body Source:
JSON editor -
JSON Body Template
JSON{ "action": "complete", "fileSize": [file_size], "fileName": "[fileName]", "contentType": "application/pdf", "folderUid": "[folderID]", "uploadId": "[UploadID]", "key": "[key]" }
We are referencing the [UploadID] & [key] variables we created in Request 1 in this request.
These variables allow Folderit to follow the upload process and track where OptimiDoc is in uploading the document.