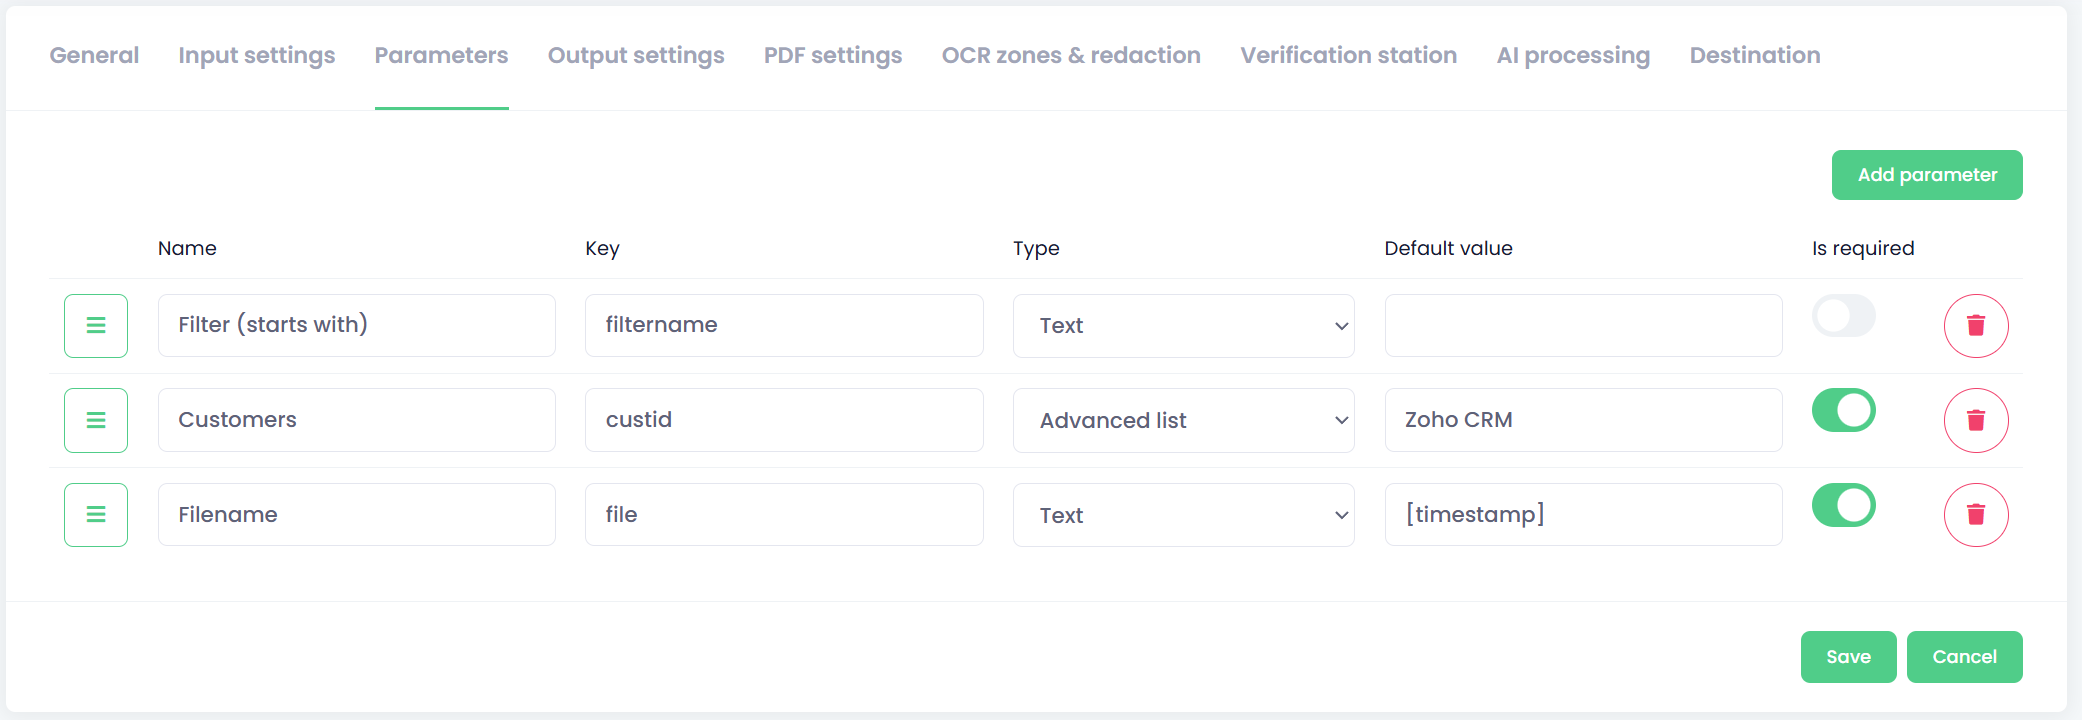
The configuration for delivering documents to Zoho CRM with Account selection on the device panel is performed in two steps:
-
Configuration of the REST API destination
-
Configuration of the Advanced List with Accounts
The configuration can be further tailored to match the customer’s specific requirements.
1. Configuration of RestAPI destination
-
Open the Document Workflow in the OptimiDoc Cloud Admin Portal and navigate to the Destinations tab.
-
Select REST API as the destination type.
-
Fill in the required REST API configuration details as follows:
-
User-specific
Enable User-specific to ensure that each user can see only their own accounts and that documents are stored using their individual credentials. -
Authentication type
-
OAuth 2.0
OptimiDoc Cloud uses OAuth 2.0 authentication to access the Zoho APIs. -
Authentication endpoint URL
Enter the Zoho OAuth authorisation endpoint URL. -
Token endpoint URL
Enter the Zoho OAuth token endpoint URL. -
Client ID
Enter the value obtained during client registration in the Zoho API Console. -
Client Secret
Enter the value obtained during client registration in the Zoho API Console. -
Scopes
EnterZohoCRM.modules.ALL.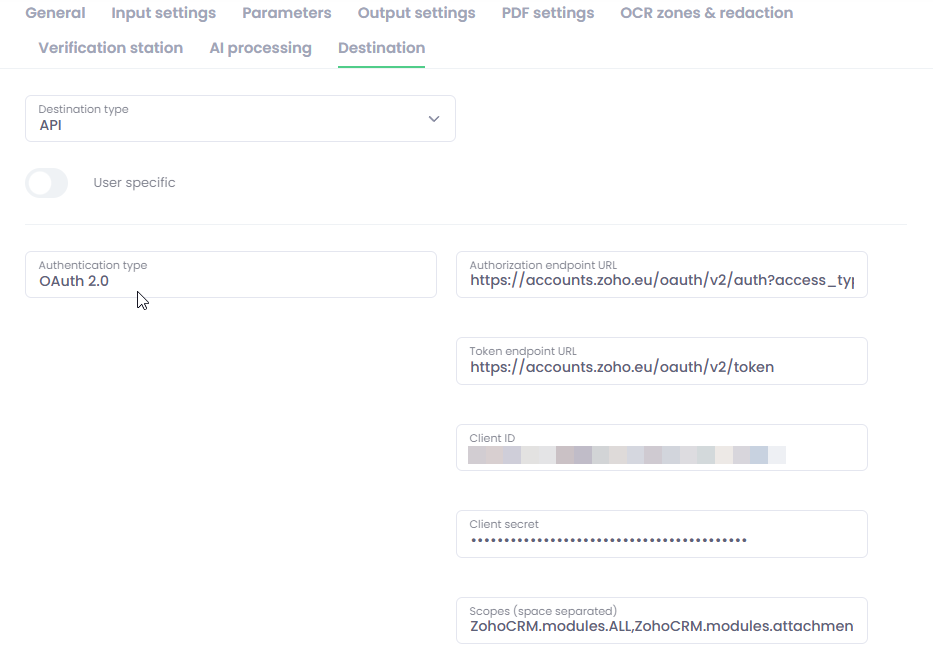
-
-
Request Configuration
Zoho CRM allows documents to be stored using a single REST API call. The API specification is available here:
Upload an Attachment API | Zoho CRM API | V8-
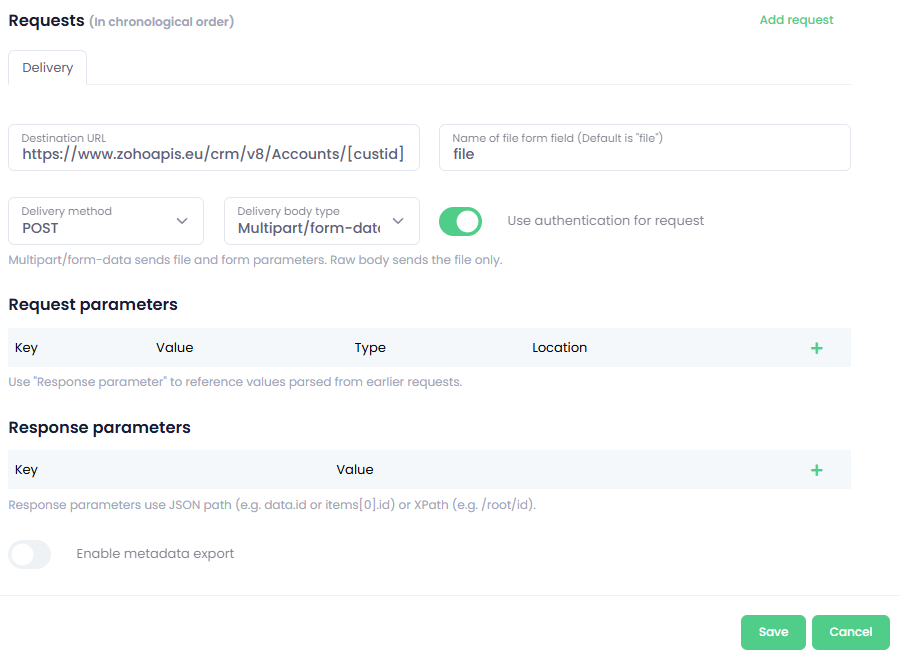
Destination URL
https://www.zohoapis.eu/crm/v8/Accounts/[custid]/AttachmentsUse the correct Zoho API domain according to the value obtained during the registration of OptimiDoc Cloud in the Zoho API Console.
[custid] - This parameter is dynamically populated with the selected Account ID from the Advanced List on the device panel. -
Name of file form field - enter file
-
Delivery method - select POST
-
Delivery body type - select Multipart
-
Check Use authentication for request
-
-
-
Click Save.
2. Configuration of the Advanced List with Accounts
Zoho API provides an endpoint for searching records within the Accounts module (Search Records | Zoho CRM API | V8). Each API call returns a maximum of 200 records.
To configure the Advanced List in OptimiDoc Cloud, follow the steps below.
Step 1: Create an Advanced List
-
Open the OptimiDoc Cloud Admin Portal.
-
Navigate to Advanced Lists.
-
Click Add Advanced List.
Step 2: Configure Parameters
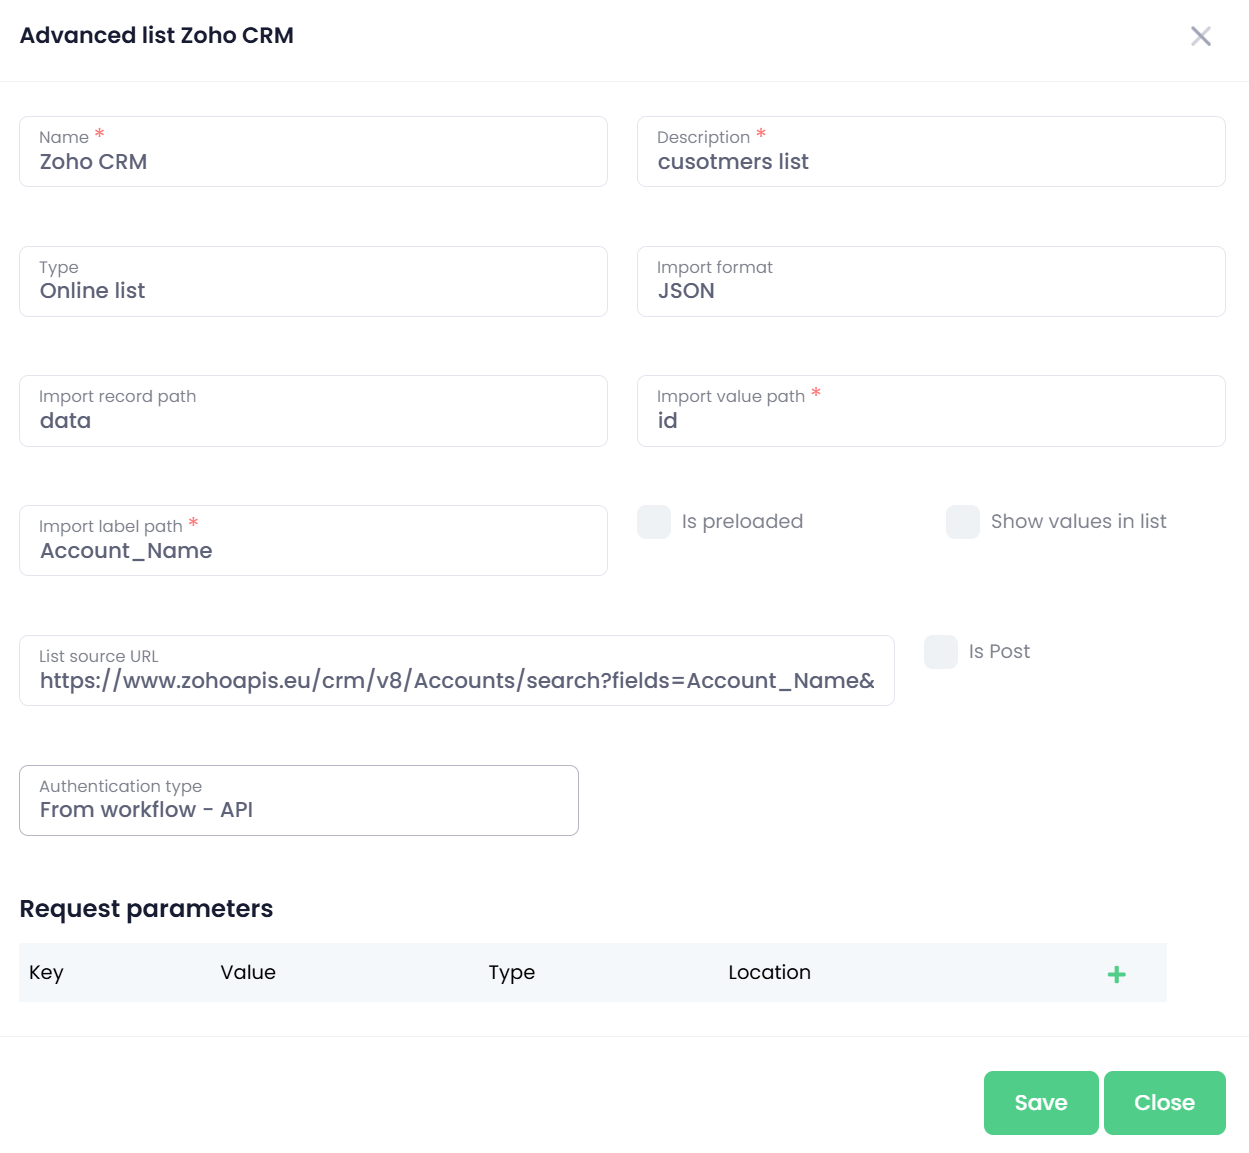
Populate the fields as follows:
-
Name
Specify a meaningful name for the list. -
Description
Provide an optional description. -
Type
Online list -
Import format
JSON -
Import record path
data -
Import value path
id -
Import label path
Account_Name -
Is preloaded
Unchecked -
Show values in list
Unchecked
Step 3: Define the List Source
Set the List source URL as:
https://www.zohoapis.eu/crm/v8/Accounts/search?fields=Account_Name&criteria=Account_Name:starts_with:[filtername]
Where:
-
[filtername]is a manually defined parameter within the document workflow. -
This parameter is used to filter account names dynamically.
Note:
Since the Zoho API returns a maximum of 200 records per request, applying a filter is necessary to ensure relevant and manageable results.
Step 4: Additional Settings
-
Is POST
Unchecked -
Authentication type
From workflow - API
3. Adding the Advanced List and Filtering Parameter to the Document Workflow
To enable account filtering within the document workflow, both the filtering parameter and the Advanced List must be configured.
Step 1: Open the Document Workflow
-
Open the OptimiDoc Cloud Admin Portal.
-
Navigate to Document Workflow.
-
Switch to the Parameters tab.
Step 2: Add Parameters
Click Add Parameter twice to create two parameters.
Step 3: Configure the Filtering Parameter
Configure the first parameter as follows:
-
Name
Enter a user-friendly display name. -
Key
filtername(must match the value used in the Advanced List configuration) -
Type
Text
Step 4: Configure the Advanced List Parameter
Configure the second parameter as follows:
-
Name
Enter a display name (e.g. Customers) -
Key
custid(must match the key expected in the destination system) -
Type
Advanced list -
Default value
Select the previously created Advanced List -
Is required
Enabled