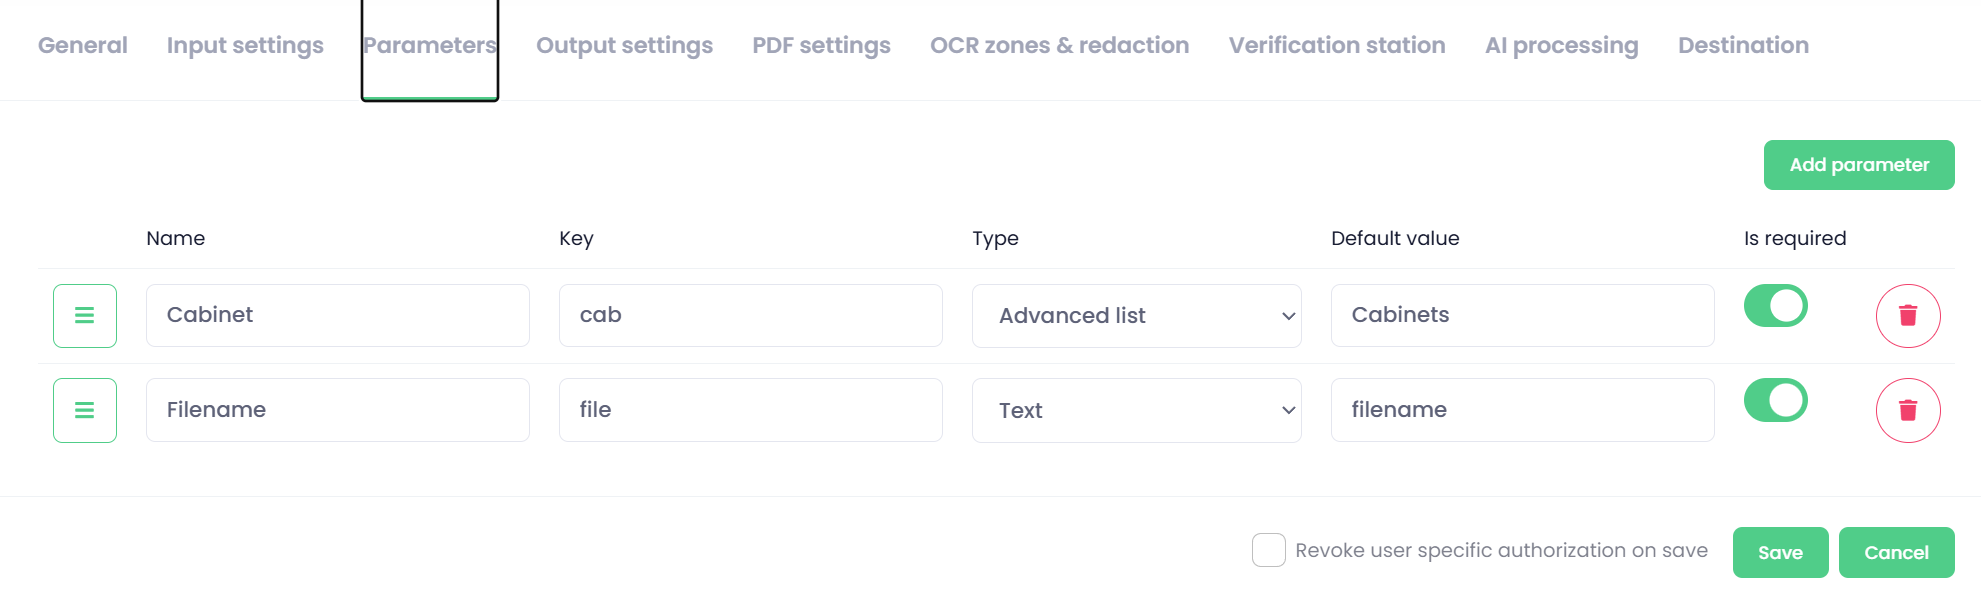
The configuration for delivering documents to DocuWare in the selected cabinet and defined filename is performed in two steps:
-
Configuration of the REST API destination
-
Configuration of the Advanced List with Cabinets
The configuration can be further tailored to match the customer’s specific requirements.
1. Configuration of RestAPI destination
-
Open the Document Workflow in the OptimiDoc Cloud Admin Portal and navigate to the Destinations tab.
-
Select REST API as the destination type.
-
Fill in the required REST API configuration details as follows:
-
User-specific
Enable User-specific to ensure that each user can see only their own accounts and that documents are stored using their individual credentials. -
Authentication type
-
OAuth 2.0
OptimiDoc Cloud uses OAuth 2.0 authentication to access the DocuWare API. -
Authentication endpoint URL
Enter the DocuWare authorisation endpoint URL. -
Token endpoint URL
Enter the DocuWare token endpoint URL. -
Client ID
Enter the value obtained during client registration in the App Registration. -
Client Secret
Enter the value obtained during client registration in the App Registration. -
Scopes
EnterDocuWare.platform DocuWare.userProvisioning openid dwprofile offline_access.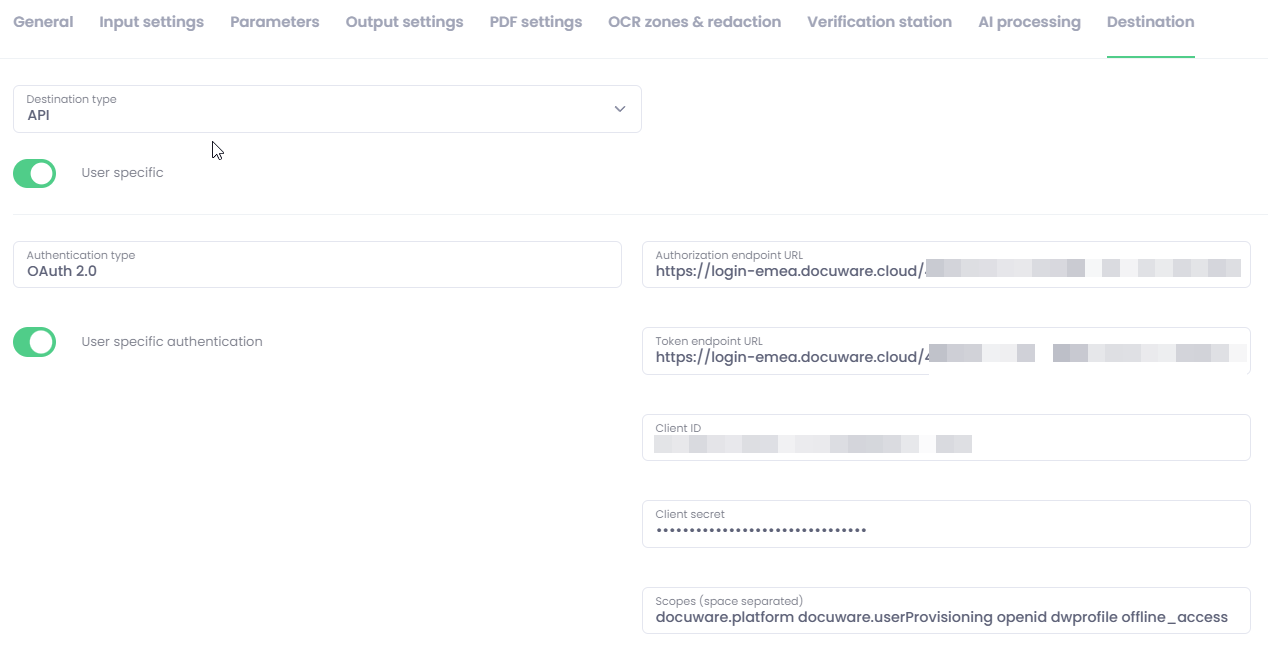
-
-
Request Configuration
DocuWare CRM allows documents to be stored using a single REST API call. The API specification is available here:
Upload an Attachment API | DocuWare CRM API-
Destination URL
https://[customer_subdomain].DocuWare.cloud/DocuWare/Platform/FileCabinets/[cab]/Documents-
[customer_subdomain] - Use the correct DocuWare API domain according to your company account.
-
[cab] - This parameter is dynamically populated with the selected Cabinet ID from the Advanced List on the device panel.
NOTE: If you want to route documents to a specific Cabinet, replace the[cab]parameter with the exact Cabinet ID. This will send all documents directly to the selected Cabinet, bypassing the advanced list configuration.
-
-
Name of file form field - enter file
-
Delivery method - select POST
-
Delivery body type - select Multipart
-
Check Use authentication for request
-
Request parameters
-
Key - Accept
-
Value - application/json
-
Type - Custom parameter
-
Location - Request header
-
-
-
Click Save.
If you want to add metadata to a document, please follow the section How to store document metadata.
2. Configuration of the Advanced List with Cabinets
To configure the Advanced List in OptimiDoc Cloud, follow the steps below.
Step 1: Create an Advanced List
-
Open the OptimiDoc Cloud Admin Portal.
-
Navigate to Advanced Lists.
-
Click Add Advanced List.
Step 2: Configure Parameters
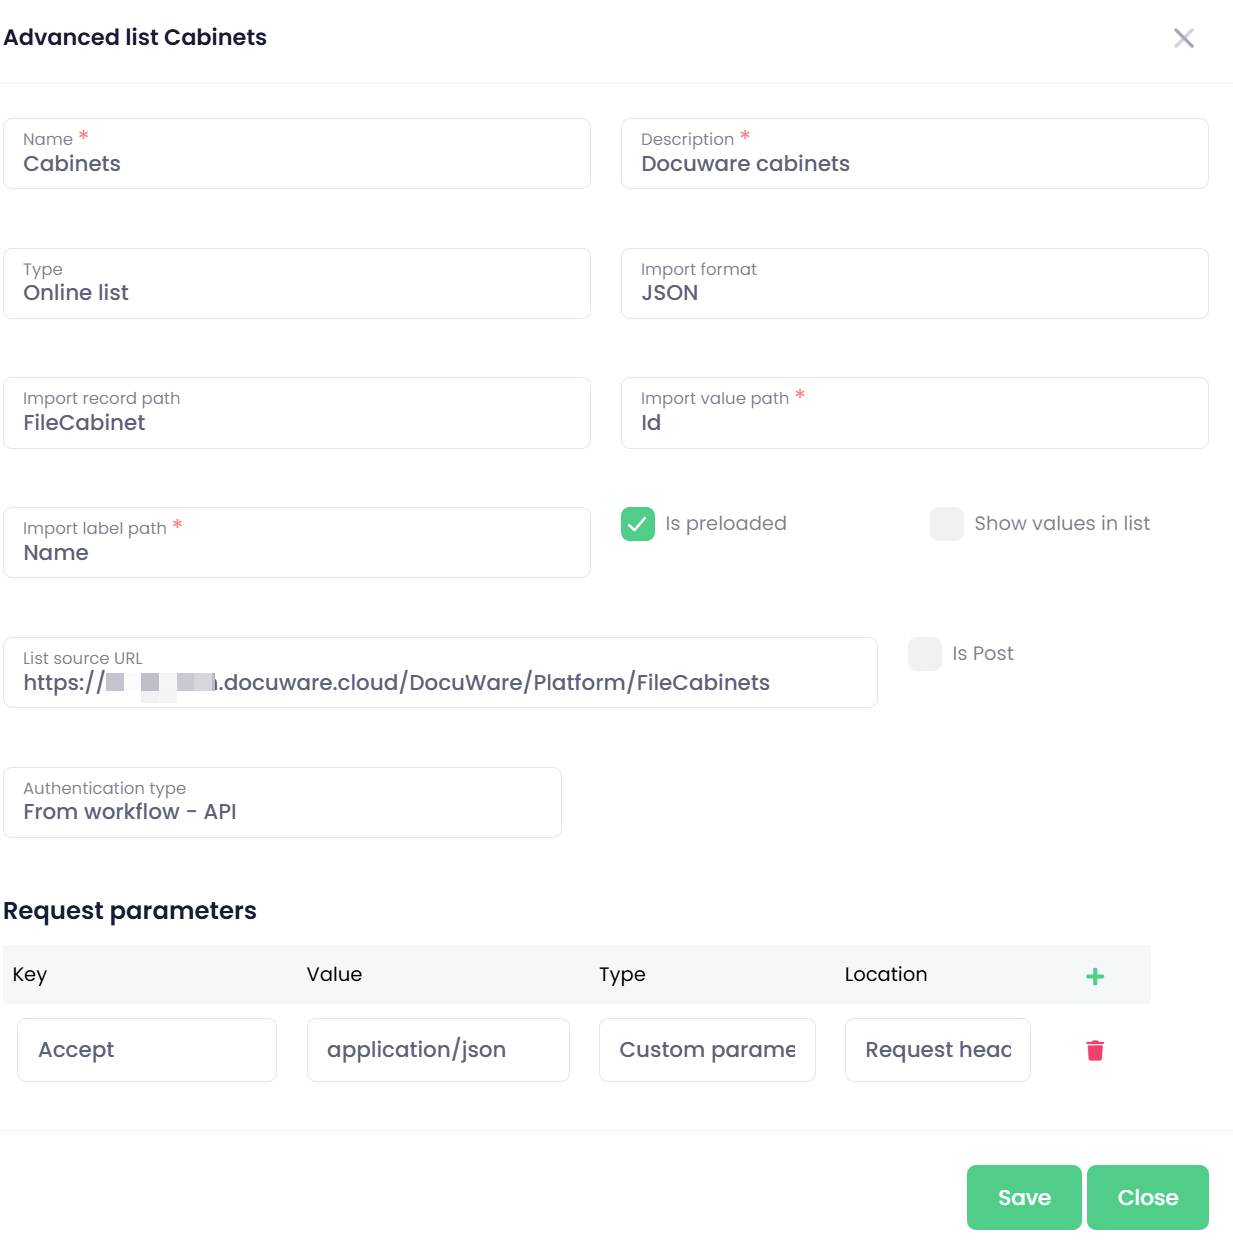
Populate the fields as follows:
-
Name
Specify a meaningful name for the list. -
Description
Provide an optional description. -
Type
Online list -
Import format
JSON -
Import record path
FileCabinet -
Import value path
Id -
Import label path
Name -
Is preloaded
Checked -
Show values in list
Unchecked
Step 3: Define the List Source
Set the List source URL as:
https://[customer_subdomain].DocuWare.cloud/DocuWare/Platform/FileCabinets
Step 4: Additional Settings
-
Is POST
Unchecked -
Authentication type
From workflow - API -
Request parameters
-
Key - Accept
-
Value - application/json
-
Type - Custom parameter
-
Location - Request header
-
3. Adding the Advanced List to the Document Workflow
To enable account filtering within the document workflow, both the filtering parameter and the Advanced List must be configured.
Step 1: Open the Document Workflow
-
Open the OptimiDoc Cloud Admin Portal.
-
Navigate to Document Workflow.
-
Switch to the Parameters tab.
Step 2: Add Parameters
Click Add Parameter twice to create two parameters.
Step 3: Configure the Advanced List Parameter
Configure the second parameter as follows:
-
Name
Enter a display name (e.g. Customers) -
Key
cab(must match the key expected in the destination system) -
Type
Advanced list -
Default value
Select the previously created Advanced List -
Is required
Enabled